The basic parts of the Version 1.0 device consist of two square steel tubes with holes
drilled in them (see directions below), two "rope ratchets", two orange
levers (sometimes referred to as "load binders"), and other small hardware
items
(bolts, nuts, washers, U-bolts, eye screws, snap ring hooks, carabiners, etc.)
Tools: A drill (and four drill bits- 5/16", 3/8", 1/4", and 1/2"
diameters), a hacksaw or cutoff saw, a knife, and two
adjustable wrenches are required to
construct the device. A vise would also be helpful to hold parts while
they are being cut.
V1.0 Preparation:
We prepared for assembly by:
Cutting two square steel tubes to length (see details
below)
Drilling nine holes (three diameters) - seven in the above two tubes, and two at the
orange lever handle ends
Cutting two ropes to length
Cutting four links (and ther attached hooks) on the two orange
"load binders", and
the chrome metal hook off each of the two "rope
ratchets" (or similar tie-down mechanism)
V 1.0 Assembly: Assembly involves:
Tightening eight nuts on bolts. These bolts connect
the two orange ratchet load
binders to each other, the (horizontal and vertical) tubes to the load binders, the eye screw (needs to be safely and securely screwed
into ceiling rafter first) to the upper load binder, and
the two U-bolts to the horizontal square tube
The two ropes with looped ends need
to be threaded through the rope ratchets (which are attached to
the U-bolts). The looped end is attached to the brass "swivel eye snap
spring hook" and the other
end is knotted securely
The two cut off ropes (no loops on their ends) need
to be attached to the lever handle of the orange load binders by threading them
through
each carabiner, and
knotted securely at both ends
These steps complete the assembly for V 1.0 of the device.
Disclaimer: Aging-At-Home.org claims no medical or engineering expertise,
and seeks only to share information we have found useful with others. Any
use of the information provided is up to others, and we assume no liability
for such use. This website is for information purposes only. This
information is not provided for the purpose of diagnosing, treating,
mitigating, or preventing any type of disease, disability, or medical
condition.
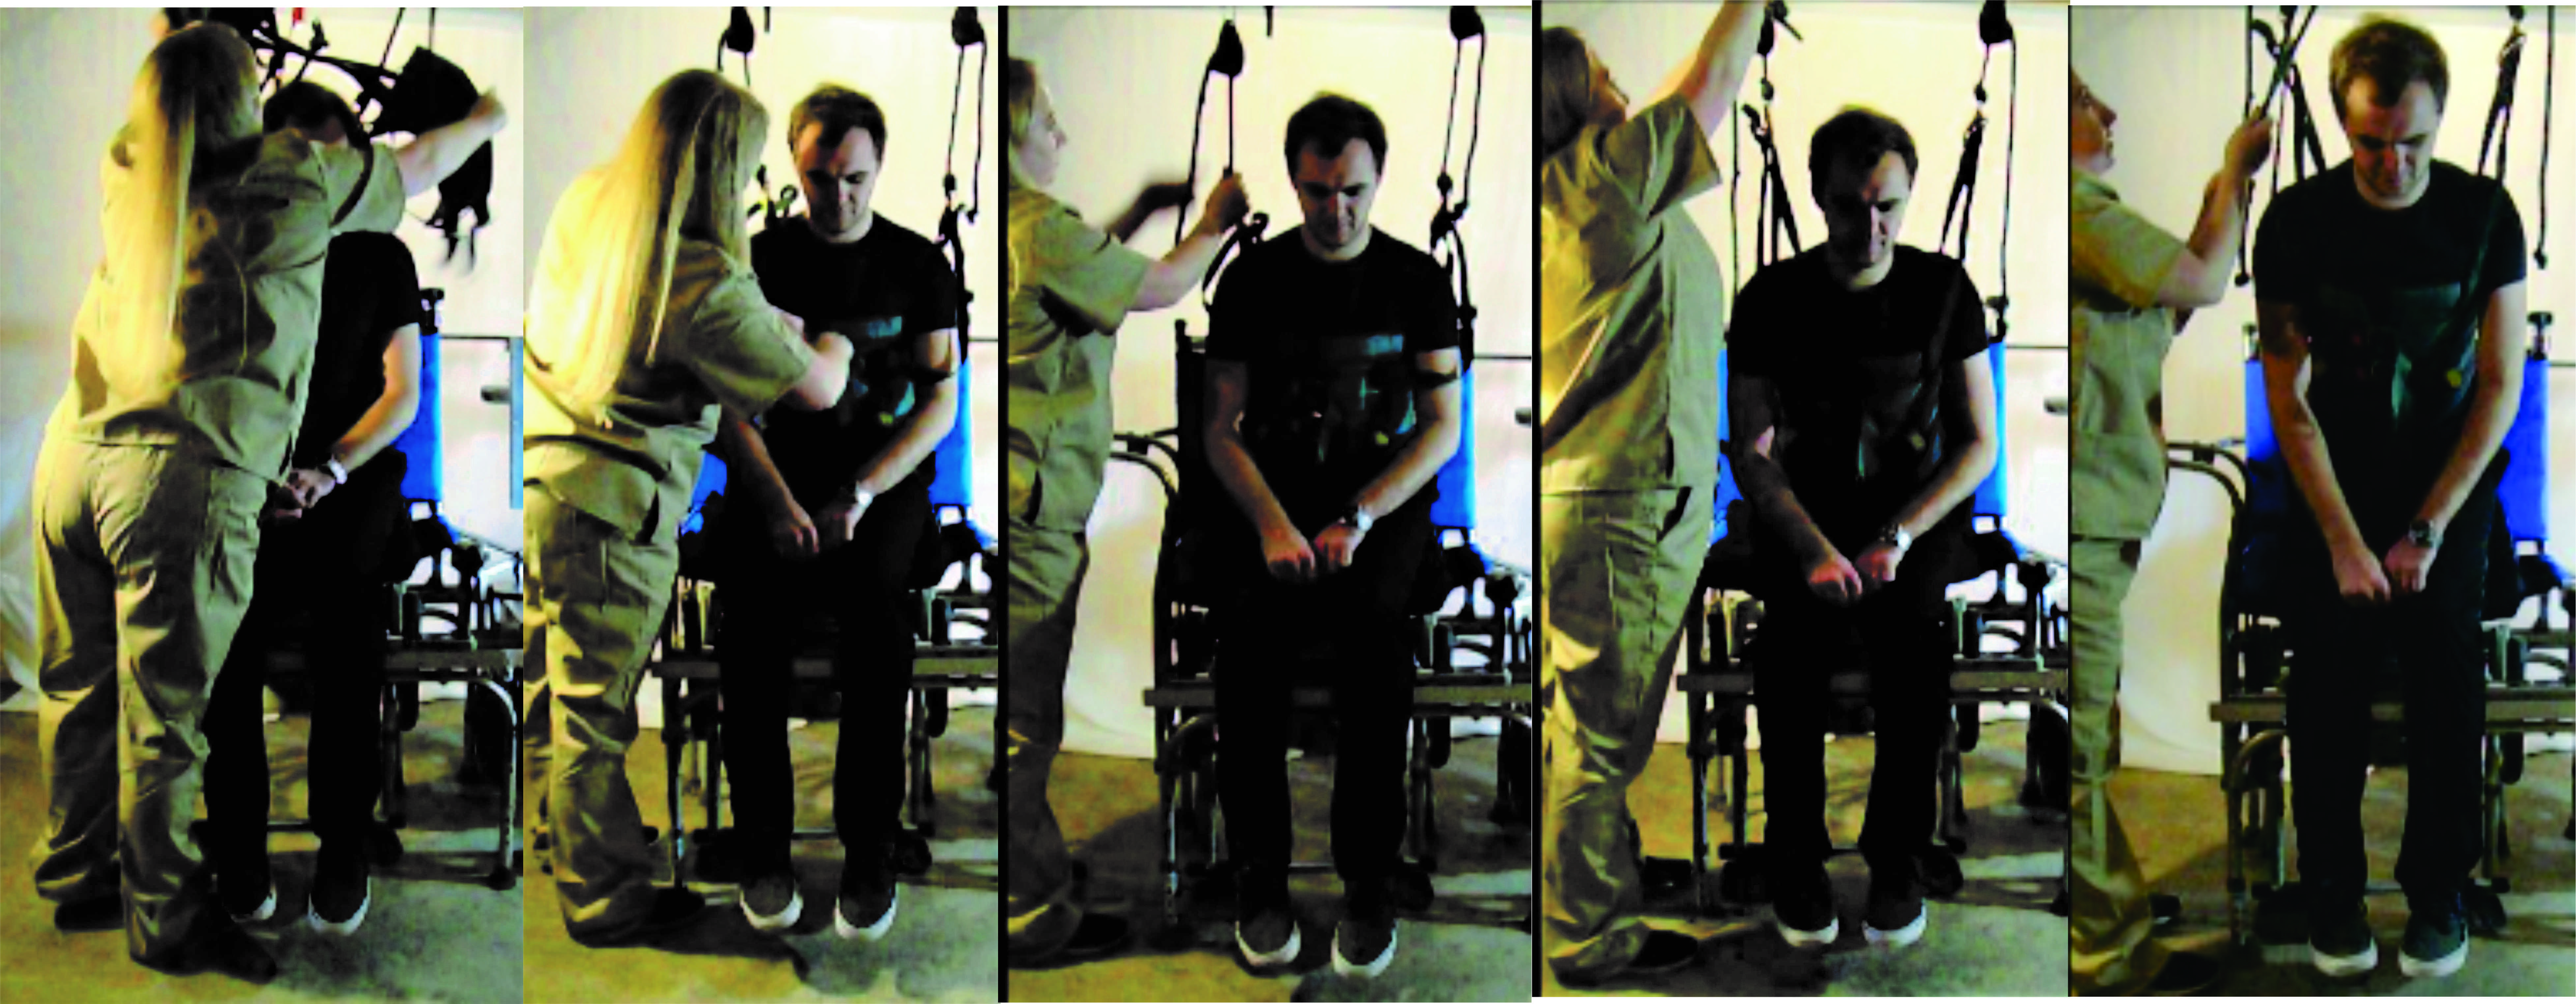
The following information explains the 14 steps
(Version 2.0 requires only 7 steps)
we followed to
construct Version 1.0 of the Aging-At-Home
device, the parts required, and their approximate costs.

NOTE: The Tube Extender below can be different lengths based on the ceiling
height. Assuming the wheelchair and commode are a standard 18 inches/457 mm from the
floor, the length of the current Tube Extender would work for a ceiling
height of between
92 and 98 inches (8' 2")/2489 mm. The ropes and rope ratchets (which allow
adjustable rope
lengths) could extend this range to about 102
inches/2991 mm. The straps on the vest adjusts in length by 6
inches/152,5 mm. For example, our ceiling is 92 inches/2337 mm high, and we use the shortest setting on
the vest's adjustable straps in the above demonstration video.
One approach is to put multiple holes (one inch apart) in the extender making it adjustable
(shorter) to accommodate ceiling heights less than 92". A better approach
is to cut the tube extender to the correct length for the ceiling's height before drilling the end
holes.
Some
experimentation may be required to determine the required length of the
tube extender for ceilings outside the range of 92" to 102" (8' 6").

The orange "Lever load binders" or "chain binders" below are commonly available
but because of their simple design, metal workers in developing
countries may be able fabricate them if no commercial ones are available.
Note that
the precise size of the load binder below is "1/4 - 5/16".

Note that parts such as the "rope ratchets" below could have substitutions that
perform the same function. Devices such "rope grabs", "rope clamps" and "ascenders" are used
by mountain climbers, window washers, and tree pruners (aborists). For
example an
"XRT Rope Lock Tie Down"
costs about $15.00 USD on eBay, can hoist 500
lbs. (226 kg), and performs the same function as the "rope ratchet" further below.

All hoisting methods for our device can
use cam-based mechanisms to tighten (and loosen) ropes under considerable load mostly for
climbing, rappelling, and as tie-downs for camping or transporting heavy objects. One advantage of using the "rope ratchets"
is that they come with
ropes that are the proper size (diameter) and material which increases
safety.


The eye screw placement page mentioned below (in Step 11) can be accessed
here.

|